Getting Started with Betamax
Betamax is a terminal session recorder for TUI applications, using tmux for headless operation.
Prerequisites
Required:
tmux- headless terminal sessions
Optional (for output formats):
termshot- PNG screenshotsaha- HTML outputffmpeg- GIF recording
Installation
Clone the repository and add to your PATH:
git clone https://github.com/marcus/betamax ~/code/betamax
export PATH="$HOME/code/betamax:$PATH"
Or symlink to a directory already in your PATH:
ln -s ~/code/betamax/betamax /usr/local/bin/betamax
Installing Dependencies (macOS)
brew install tmux
brew install homeport/tap/termshot
brew install aha
brew install ffmpeg
Verify Installation
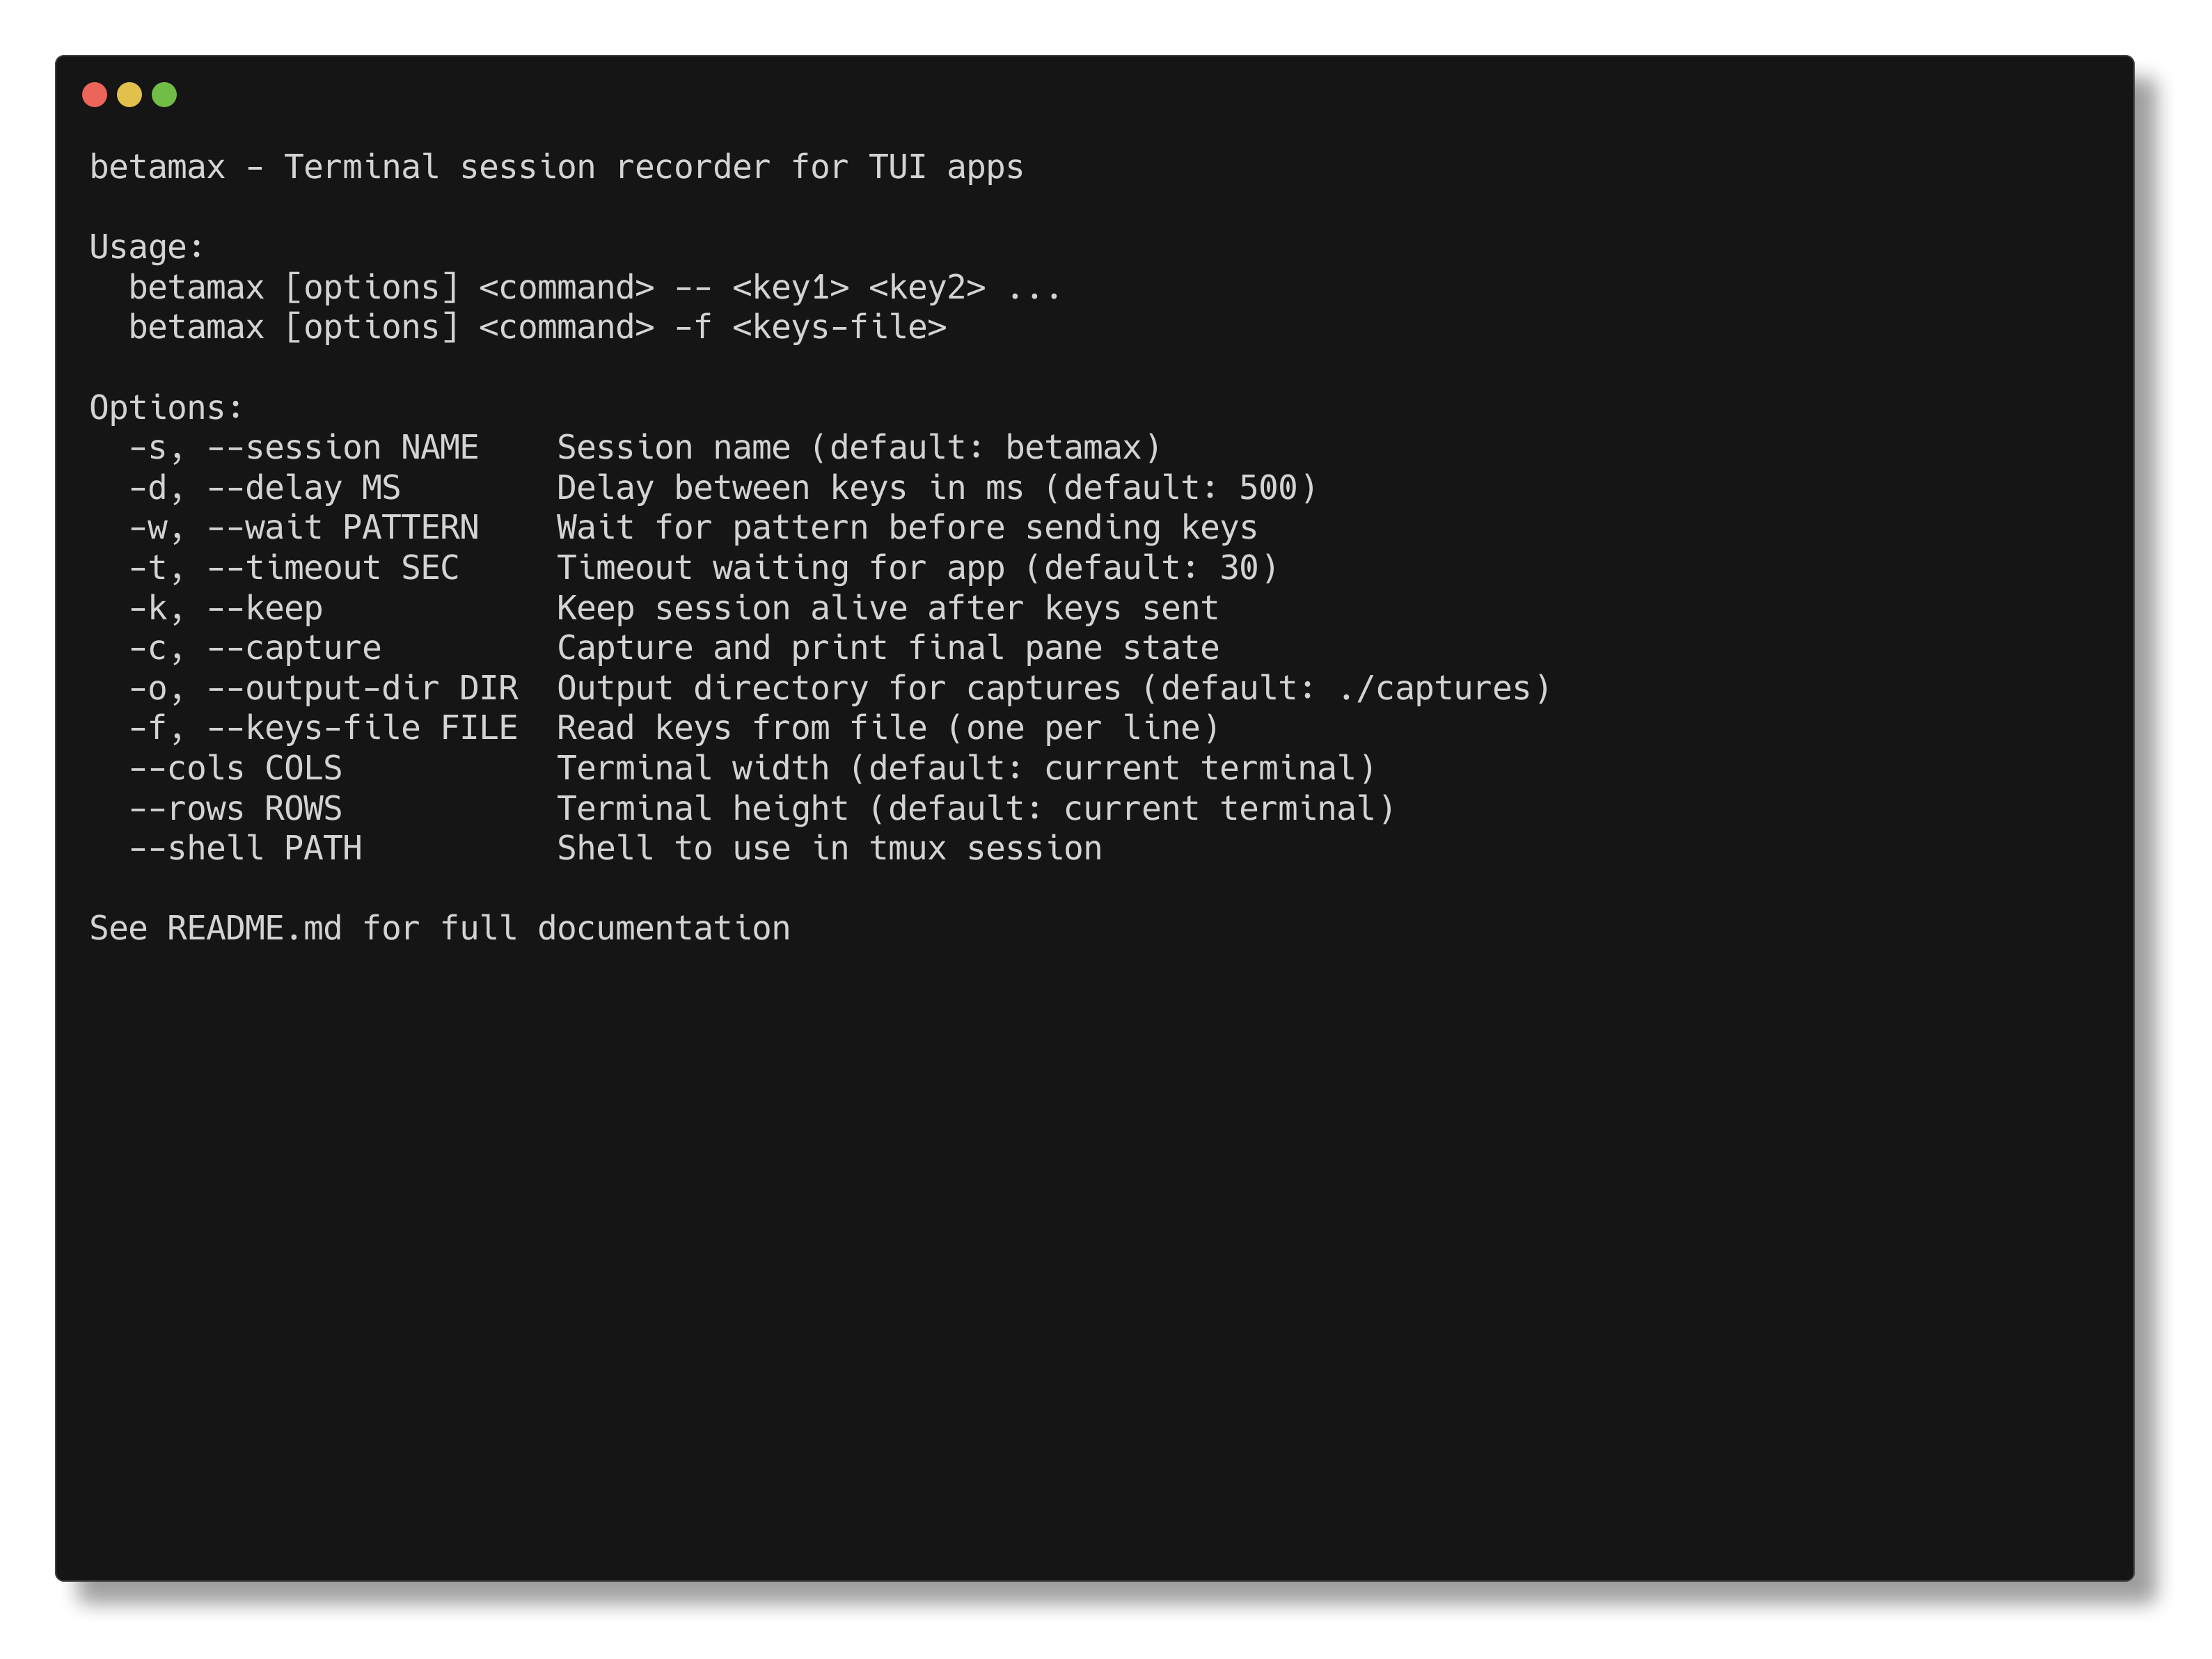
betamax --help
Your First Capture
Interactive Screenshot
Capture a TUI screenshot at any moment with a hotkey:
betamax capture vim myfile.py
Press Ctrl+G at any time to take a PNG screenshot. Exit vim normally and betamax prints the file paths. Supports themes, shadows, and window bars via flags or config files.
Recording Sessions
Interactive Recording
Record your terminal session and capture keystrokes with timing:
betamax record -o demo.keys vim test.txt
Type normally, then press Ctrl+D or exit to stop. Your keystrokes are saved to demo.keys with precise timing.
Play it back:
betamax "vim test.txt" -f demo.keys
Quick Inline Capture
For simple captures, use inline keys:
betamax "echo 'Hello, Betamax!'" -- @sleep:500 @capture:hello.txt
This runs echo, waits 500ms, and captures the output to hello.txt.
Screenshot with Wait
Wait for an app to load, then capture:
betamax "htop" -w "CPU" -- @sleep:1000 @capture:htop.png q
Next Steps
- Capturing Screenshots - Interactive TUI screenshot guide
- Recording Sessions - In-depth recording guide
- CLI Reference - All options and keys file format